Posts

Showing posts from 2011

Cute Mini Album...

Image
Well I tried out for the Imaginisce DT for 2012 and didn't make it, but I'm showing you one of the projects I made. I did this cute mini album using their Enchanted line. Not sure what I'm gonna do with the album yet, but I'll figure it out I'm sure. :-) Front Cover: Pages 1 & 2: Pages 3 & 4: Pages 5 & 6: And then there is a back cover that's just solid light blue, but I didn't photograph it.  Alright, that's it for today, off to finish up a couple of projects I have going that need to be done before the weekend. Busy week ahead! Thanks for stopping by! Happy Craftin'! Brittany

November Cricut Circle Magazine Challenge

Image
So every month the Cricut Circle Magazine issues a challenge to the Circle Members. This month the challenge is to use the Sophie Circle cartridge to make a holiday project(using at least 3 cuts from Sophie). Now, my project has a little bit of a story behind it... I have a kiddo who's almost 5(he'll turn 5 just two weeks before Christmas), and he's apparently seen 1 Christmas movie too many because he came out of his room about a week ago freaking out because Santa wasn't going to be able to bring him presents because we don't have a chimney for Santa to use to get in our house(we live in an apartment). I told him that we would leave out special keys that only Santa could make real so that he could get in the front door to leave him presents. He agreed. *Crisis averted* Okay so that was a lot of quick thinking on my part, so then I had to come up with Santa's "magic" keys, lol, and I was dreading it. Then this challenge came up, and I started looking

Wow it's been a little while...

So it's been a couple of weeks since I've posted anything, sorry for the lack of posting, I spent a week puppy sitting for my mom & step-dad at their house so I didn't even get to be crafty, I was a little sad. :-( I'm back in full swing this weekend and doing all sorts of projects so I'll be updating with a new crafty post or two or three soon. Have a great weekend! Happy Craftin'! Brit

Cricut Circle Blogaversary Recipe Challenge

Image
One of the challenges was we had to use a title, 2 Cricut cuts and 3 buttons. Gavin and I had decided to make fall cookies(the premade ones with the shapes in the middle, lol, he picked out pumpkin ones in the store) so here's what I came up with: The leaves are from Create a Critter, I omitted the face cuts so I could use my Peachy Keen face stamps on them, they are cut at 1.25" and 1.50". The Pumpkins are cut from Simply Charmed, again, omitted the face cuts to use the stamps, cut at 4.25". I love the fluffy light blue tulle behind the pumpkins and the doodling. It was fun to make, but a lot of work! Oh, and the font is Sunny Day from the Sesame Street Font cartridge. I don't normally get quite so detailed on my scrapbook pages, they're usually pretty simple. Now to just get the pictures printed in the next few days! 

Cricut Circle Magazine Challenge- September

Image
So over at the Cricut Circle Blog they post a magazine challenge every month, September's was to make something with Echo Park Paper Company product and at least 4 Cricut cuts. Now, I have absolutely NO clue how many Cricut cuts are on this project, because there are lot of them, but it was fun! Now surprisingly there isn't a single Halloween cartridge used on here, lol, I used Paper Doll Dress Up and Create a Critter(for the house). I love all the extras to be found on the Paper Doll Dress Up cartridge, it's one of my favorite ones to use. There are at least 15 Cricut cuts on here, lol, so I'm pretty sure I met the requirements. I used Echo Park Happy Halloween Collection, solid card stock from The Paper Company, some Rusty Hinge Distress Ink on the pumpkins, Stardust, Black Diamond & Lime Green Stickles, a face stamp from Peachy Keen Stamps, and some baker's twine from The Twinery. I've been working on this project pretty much since it was announced, t

Cricut Circle Blogaversary Challenge #6: Sketch Challenge

Image
So this is the last challenge that was given, create a project using the sketch below and at least 2 Cricut cuts. Here's the sketch: And here's what I did with it: Details: All patterned paper, plus the 3 stars and the red scallops are from the Animal Soup Boy Collection from My Mind's Eye(LOVE this line). Yellow card stock and the chocolate base by The Paper Company. Onesie cut at 2.25"(duck is part of it), and then I cut 3 more ducks just a bit smaller to use as the top accents(B is for Boy Lite). Scallop circle cut from Lovely Floral at 3.0". All inked edges where done with Tim Holtz Distress Ink in Vintage Photo, ducks were all made sparkly with Stardust Stickles, Welcome baby stamp is from My Pink Stamper's Everyday Life set. Pretty basic card using mostly a kit, but I love it. It turned out super cute and could easily work for a boy or girl. 

Cricut Circle Blogaversary Challenge #1

Image
The Cricut Circle Blog had it's first anniversary and they issued a number of challenges. The first challenge was to make a project with a Circle Exclusive Cartridge and use at least 2 Cricut cuts. I used Sophie for mine. Details: Sophie Cartridge, Butterfly 1, Card 3 feature at 4 inches, also cut the inside line for it(light pink). Finished size of this cut was 4.0" by 5.25".  Simply Sweet Cartridge, "get well soon" cut at 2.0".  Green strip cut size 2.25" x 5.25" Chocolate base cut at 4.25" x 5.37" I actually layered the finished card from Sophie on a Chocolate card base because I wanted the inside liner of the card to be hidden from the inside. The light pink liner and the green cardstock strip were also embossed with the Swiss Dots Cuttlebug folder, and the butterflies were then filled in over the pink with Stardust Stickles. The chocolate ribbon is a velvet ribbon I got at Joann's a year ago, I can't remember who makes it.

Cricut Circle Weekly Challenge

Image
So the weekly challenge was to make a card in honor of world card making day using at least 2 Cricut cuts. Here's mine: Details:  The bird was cut from 3 Birds on Parade at 3.5", and the scallop circle was cut from Lovely Floral at 4.00" Twine from Divine Twine, stamp from My Pink Stamper's Everyday Life set.  Patterned Paper by Echo Park from the Little Boy collection, solid cardstock(bird and card base) from The Paper Company, other than the green which is from DCWV. Dimensional Magic by Mod Podge used on the bird's pacifier. 

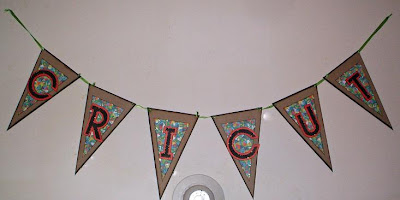
So these were my Cricut Banner Contest Entries...

Image
I actually did 2 banners for the contest that Cricut did for the HSN release of the E2. Here they are:  Banner 1 used the Sesame Street Font, Serenade, & Hannah Montana cartridges. Banner 2 used Tags, Bags, Boxes & More, Sweet Treats & Simply Sweet cartridges. Banner 2 also used the Seeing Spots, Argyle, and Swiss Dots Embossing Folders for the Cuttlebug.  I didn't win, but I sure had fun making them. Now I'm working on the Cricut Circle Magazine Challenge. I like challenges, and my Cricut so they keep me thinking!  Happy Crafting! Brit

Tackle It Tuesday...

Image
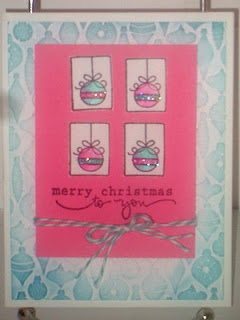
So Chris over at TurnedGypsy has a challenge/giveaway. You're supposed to do something with coloring, using Cri-Kit pens if you have them or the Cricut Markers. I don't have either one so I opted for coloring instead. I just used colored pencils in both of these. I like how they turned out. Pretty sure the one is definitely my Christmas card for this year! The second one I thought would be a good card for Breast Cancer Awareness month in October. supplies: a2 white base white cardstock cut at 4"x 5.25", embossed with a sizzix christmas embossing folder, and inked with Tim Holtz Distress Ink in Broken China Ornament stamp by Studio G Sentiment stamp by Studio G Baker's Twine in Caribbean by The Twinery Black Ink by Momento Crystal Stickles  pink cardstock cut to 3" x 4" supplies: all cardstock by the paper company pink stripe paper by Echo Park(Be Mine Collection) "hope" stamp- My Pink Stamper(Pink-a-licious) stamp, free digi- Paper Makeup

Throwback Thursday Challenge for Sept. 1st.

Image
I loved the challenge for My Creative Time's Throwback Thursday challenge on Sept. 1st. I don't always participate depending on how many other projects are going on at my house, but this one was a "Cricut-less" challenge and a color challenge. We were challenged to use purple, orange, green, & black and no Cricut/Expression/E2/Gypsy machines. We still had use of punches and Cuttlebug. So here's what I came up with: I used Echo Park's Happy Halloween collection, a cute black & purple spider brad from Making Memories Toil & Trouble line, and some pretty sheer green ribbon, and black cardstock from The Paper Company as a base. Only other products were some clear stickles on solid purple dots and foam 3-d squares under the "happy halloween". I love this card, it was super quick and easy which is always a bonus, and it turned out cute!  Thanks for stopping by,  Happy Crafting! Brit 

Interactive Card Blog Hop Winner!

Alright so it's been a little crazy round here, lol, my almost 5 year old has been absolutely silly. He wants to start Kindergarten but he's not old enough this year, so he's driving me crazy, lol.  Anyways, I picked the winner from the blog hop, very scientific I am, lol, went through to make sure the comment makers were followers, and then used random.org to pick a number, and then counted through day 1 and 2 posts by time stamp to pick the right comment. Okay enough of my ramblings!  The winner is.... Aly's Mom Yay for you! But you didn't leave your e-mail, so you have 1 week to email me at either britngavin@ymail.com -or- britk.designs@ymail.com  If you didn't win, well keep your eyes peeled because I'll probably do a giveaway of sorts when I hit 100 followers. :-)  Until later my fellow crafty people! Brittany

Interactive Card Blog Hop Day 2

Image
Welcome back for day 2 of this fantastic hop! I hope you enjoyed all the projects yesterday, everyone's very talented, and I know I had a lot of fun with mine. If you're just joining us today, go to Monica's blog , she's our leader for the weekend, and everything starts there. So for day 2, I made a double pocket card. All put together: With tag & gift card pulled out.  Supplies Used: Tan cardstock by Wassau Paper  All Patterned paper from Fine & Dandy Girl's line by MME Ribbon from a vintage collection by Making Memories Peeled Paint, Rusty Hinge & Broken China Distress Inks I used a tutorial from Splitcoaststampers for this card, I changed the cuts for the pocket piece a little, to cut the medium section, I cut it to 3 3/4", and to do the front section I cut an additional 1" off the first panel. You'll see what I mean if you look at the tutorial { here }. Now I have a little blog candy, and well it's mystery blog candy. Just a li

Interactive Card Blog Hop Day 1

Image
Hi all and welcome to my stop on the Interactive Card Blog Hop Day 1. If you came over from Stephanie's blog, you're in the right place,  if you wandered across my blog just because, stop, and go to Monica's blog { here } she's the very beginning and the one responsible for making this happen. There are tons of different styles of cards so Monica asked a bunch of us if we'd like to show a bunch of them. Over the course of 2 days you'll see more than 20 different card styles. Some of us are doing tutorials right on our blogs for you and some of us will be linking you to the tutorials that we used ourselves(yep, I know I'm included the ladies that had never tried either of the card styles that I'm showing this weekend). Ready? I'm showing the Double Slider today, and I'm gonna admit, this one was a challenge for me. I think it's because I didn't have the word window punch that they use in the directions, it took a little playing with but e

My Cricut Craft Room's Card & Invitation Blog Hop

Image
Welcome to the Card & Invitation Blog Hop hosted by Erica at My Cricut Craft Room. If you're just stumbling upon my blog start at the beginning { HERE }, this will get you to Erica's blog and let you know all the requirements for the blog hop candy. Here we go! So I'm completely unsure what I'm using this card for yet, but I like it. It measures 4" x 8". The base is a die cut sheet from the 8 x 8 pack of patterned paper from the Dilly Dally line by Making Memories. The plaid & butterfly print are also from that line, I manipulated a bracket shape on my Gypsy so that it would mimic the shape. Not sure which cartridge it ended up being off of. The ribbon is by Making Memories also it's from a vintage line, grosgrain with a ruffled edge. The yellow flower is a sticker from the Making Memories Chloe's Closet line and the stick pins are from that line also. The "Live. Laugh. Love." stamp on the bottom right corner is from My Pink Stampe

It's that time again!!

Image
Yep, that's right! Robyn, aka My Pink Stamper, and owner/creator of My Pink Stamper Stamps & DVD's is having another Design Team call. Now, let me tell you, this is the third time I've tried out for Robyn's DT, and well I'm hoping that the third time is the charm! So the challenge was to use Orange, Turquoise, Green & Brown, plus we could use one other color of our choice if we so desired to, plus we had to use our favorite Cricut cartridge. Well my favorite Cricut cartridge of the moment is the Serenade Solutions cartridge, it's just way too many pretty images on it, so here's what I came up with! Recipe:  A2 card base (I used a kraft brown cardstock) Orange layer cut at 4 1/8" x 5 3/8" Green Layer cut at 4" x 5 1/4" Brown Strip cut at 2 3/4" x 4" and then punched along 1 edge, I used Fiskars Treading Water Lt. Turquoise Strip cut at 1 1/4" x 4" Turquoise Bird(from Serenade) cut using Gypsy(I flipped the

A couple of cards....

Image
These 2 cards are others I used for the DT try out, love the little girl one! Okay so she's too cute. She's from Stamping Bella, I love their stamps, I need to get more soon, lol! Lil Emmy Card: All Paper & Cardstock- DCWV Ribbon- American Crafts Ink- Momento Tuxedo Black & Distress Stormy Sky Stamp colored with Bic Mark It Markers 3D Dimensional Squares- Therm o Web Clear Stardust Pen- Sakura Fiskars Border Punch- Effervescence  Now this little owl is cute, I had cut a similar owl on a card months ago, and wanted to do it again.  Hoo-ray for you! Card: Pattern Paper- Echo Park's A Walk in the Park Solid cardstock- The Paper Company Diamond Stickles "Hoo-ray for you" Stamp- My Pink Stamper's Tweetie Hoo Puns Fiskars Border Punch- Apron Lace Ribbon- From stash Happy Craftin! Brit

Wow it's been awhile

Image
Just realized that I haven't posted anything crafty lately, so here's the first of a few posts, they'll go up over the next day or so. I've been doing a lot of crafty things recently so ready, set, here we go! I did this cute little purse a little while back when I was trying out for a DT. I didn't make it on the DT but I love this purse!  Supplies used: Chipboard purse- be creative pattern paper- ?? maybe My Mind's Eye, not sure, it's been in my stash for 2 years! all flowers- Prima Marketing, Got Flowers Brown Jar & inked with Distress Ink in Stormy Sky Brads: Making Memories Distress Ink- lots of it in Stormy Sky Distress Crackle Paint- Rock Candy Metallic Rhinestuds- Tulip Tattered Angels Glimmer Mist in Marshmallow on the flowers Adhesives Used:  Mod Podge for attaching paper to chipboard purse & hot glue for attaching flowers to the purse Rhinestuds are heat set and everything else is ink, paint or spray.  This took a lot of work, but I lo

Amazing blog candy!

Okay, so I was doing a bit of blog hopping while I couldn't sleep last night/this morning, and came across Scrap with Stacy. She's got some super cute projects and is giving away not 1 but 2 blog candies! You have until July 1st to sign up, so go check her out HERE .

Cricut Circle May Magazine Challenge #2- Make It Your Way

Image
So this is my entry for the Make It Your Way contest for the Cricut Circle Magazine contest. The contest was to pick a project from the May issue of the Cricut Circle Magazine that inspired us and make it our own. I fell in love with the postage stamp shaped card on page 42 of the magazine(original card made by Cristal Hobbs~ aka Pinky), and so I decided to do my own postage stamp styled card, which let me tell you was a little bit of a challenge when you don't have the Spring Holiday Cards Cricut Cartridge, lol! I ended up using a tag from Gypsy Font as my stamp base and then welded a square from Plantin Schoolbook to one edge to make a card base. Then I cut another square(4.67" x 4.67")(I used my Gypsy so I could make sure everything would layer correctly). The scalloped border is also from Plantin Schoolbook, it's the Tall Ball feature(1.5" tall by 4.67" wide). The shoes are from Gypsy Wanderings, I placed 2 of them(at 2.11" high), welded them to how

Cricut Circle May Magazine Challenge #1(Sponsor Contest)

Image
This is my entry for the Cricut Circle Magazine Sponsor Contest. The sponsor was Imaginisce, and we had to use 3 of their products, plus at least 4 Cricut cuts. I used 3 different styles of paper from Imaginisce, plus the i-Top(I used the small brad daddies, 3 with toppers from the all occasion pack, and 2 with scraps of the other papers I used) and some of the hot rocks. All cuts(the 6 butterflies and Precious phrase) are from the Once Upon a Princess Cricut cartridge. Full details below the pictures as always.      Supplies Used:  By Imaginisce: Princess Promenade Double Sided Cardstock(Enchanted) Fairy Trails Double Sided Cardstock(Enchanted) Princess Posies Double Sided Cardstock(Enchanted) i-Top All Occasion Paper Toppers i-Top & 16 mm brad daddies clear Hot Rocks Compact Provo Craft: Cricut Personal Cutter Gypsy Once Upon a Princess Cartridge(3 butterflies at 1.5", 3 butterflies at 1.75" and "Precious" phrase at 5") All Other Supplies: Pink Cards

My Creative Time Throwback Thursday Challenge

Image
So this is my entry for Emma's Throwback Thursday Challenge over at My Creative Time . The challenge was to use Doodlecharms or any older cartridge and the color blue had to be somewhere in our project. Well I don't have Doodlecharms so I used Paisley which is one of the oldest shape cartridges I have! Here's what I came up with: Recipe: Purse, cut from Paisley at 3.5" Patterned paper: Echo Park Little Girl Collection Solid Cardstock: The Paper Company Flowers: Prima Ribbon: Bazzill Basics Stamp: My Pink Stamper's Pink-alicious set Stardust Stickles Ink: Momento Rich Cocoa I think it turned out cute, this is a super quick card, I think it was 15 mins, including cutting the purse & doing the picture, lol, normally my creative process takes a little longer. :) Happy Crafting! Brit

Last One

Image
So this is the last project I did for MPS's NSD Celebration. Challenge #11, use Pink, Black & Green. I love this card! Paper is DCWV, other than plain card stock which is The Paper Company. "Rock On!" is from Everyday Life by My Pink Stamper, Guitar is cut from Hannah Montana, & the tulle is from the fabric dept at J's.

Understated Glam

Image
So here we go again, lol, post #7 for MPS's NSD Celebration. I'm not participating in Challenge #8 so here we go directly to challenge #9. Glitz, Glam & Glitter. I decided to do kind of understated glam. Metallic shimmer paper, patterned paper that has glittery stripes and then rhinestones & satin ribbon. It's not obvious, but in person it looks pretty glam, and I love it.

Create a Scrapbook Layout

Image
Okay, so here's post #6 for MPS's NSD Celebration. Challenge #7 was to make a scrapbook layout. This layout ended up being an experiment because I've never used Tim Holtz Distress Inks before, and well, I've only got 1 color, and now I want a bunch more. I'm not usually a "messy" person when it comes to scrapbook pages, and playing with Distress Inks totally changed that! See below the pictures as always for more details.  Okay, so there is a lot going on! Inking, stitching, stamping, embossing, doodling, heat setting studs, I did a lot, lol.  Products Used: 12 x 12 Cardstock by Wassau Paper Echo Park Little Boy Collection(Patterned Paper & Alpha stickers) Tim Holtz Distress Ink(Brushed Corduroy) Blue Chalk Ink from Chocolate & Blueberries Cat's Eye Stack by Colorbox Baker's Twine by The Twinery Thread by DMC Glimmer Mist in Marshmallow & Graphite Heat Set Rhine-studs by Tulip Buttons from my stash Stamped words are done with